Last night, you could’ve wanted chili but only had dry beans and no time, so you faced the same kitchen problem many cooks recognize well. Should you quick soak or use pressure, you can turn that hard wait into a much shorter one, but the trick is understanding which beans soften fast, how much water to use, and at what point to stop before they turn mushy.
What Beans Cook the Fastest?
Usually, the beans that cook the fastest are the ones you’ve soaked well and softened before the pot even hits the stove.
You’ll often notice that smaller bean varieties, like lentils, split peas, and some black beans, move through cooking times more quickly than bigger, older beans.
You can trust that fresher beans usually soften faster, too, because they’ve stored less and kept more moisture.
At higher elevation, though, you’ll wait longer no matter which beans you pick, so your kitchen altitude matters.
Should you want a smoother meal with less waiting, choose tender bean varieties initially, then plan for shorter cooking times.
That way, you’re not guessing at the stove.
You’re cooking with confidence, and that feels good.
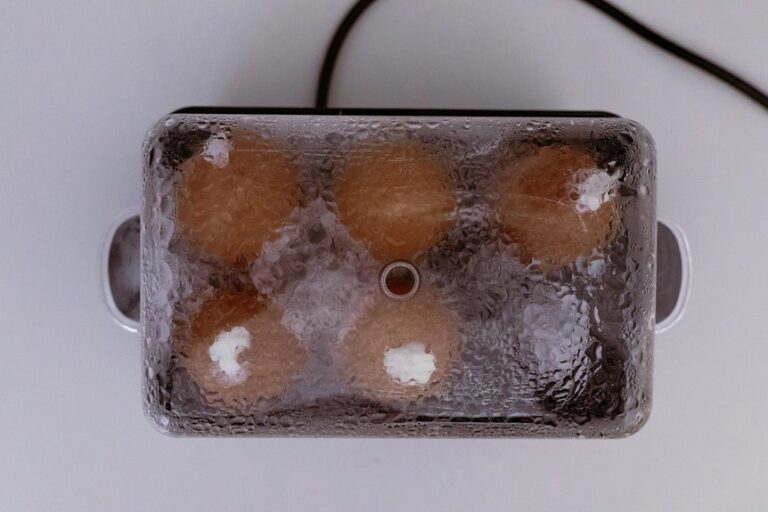
How to Quick Soak Beans
A quick soak can take the stress out of bean cooking and get you moving faster.
You start by rinsing and sorting your beans, then cover them with about two inches of water. Bring them to a boil for 2 to 5 minutes, turn off the heat, and let them rest for 1 to 2 hours.
This simple shift in soaking chemistry helps water move into the beans faster.
Should your kitchen feel cool, ambient temperature might slow the soak a bit, so keep the pot covered.
After soaking, drain and rinse the beans, then cook them in fresh water. You’ll cut prep time, and you’ll still get beans that feel like part of your table, not a chore.
Cook Beans Faster Without Soaking
Provided that you skip soaking, you can still cook dry beans well in case you give them the right start and enough time. You’ll want to rinse them, then simmer them gently in plenty of fresh water so the skins soften evenly.
Keep the heat low, and stir now and then so nothing sticks. Should your beans seem extra old, just expect a longer wait.
A small pinch of salt near the end helps flavor without slowing them down. If short on time, canned puree can fill in for part of the batch and still feel homemade.
For leftovers, microwave reheating works well whenever you add a splash of water first. At the outset, you can serve a cozy pot your table will welcome.
How to Pressure Cook Beans
Lock your beans into the pressure cooker, and you can turn a long wait into a much shorter one. You’ll feel like part of a smart home-cook circle when you use pressure cooking well. Follow a simple safety checklist: inspect the seal, keep the valve clear, and never fill past the marked line.
- Rinse and sort your beans initially.
- Add fresh water and lock the lid.
- Bring pressure up, then lower the heat.
Use these pressure tips to keep cooking steady and calm. After the cooker reaches pressure, let the beans cook until they soften, then release pressure safely. Should the beans still feel firm, give them a little more time.
With this method, you get tender beans fast without fuss, and that makes dinner feel easier for you.
Get the Bean-to-Water Ratio Right
Getting the bean-to-water ratio right can save you from a pot that’s too dry or a mushy mess, and that balance matters more than most people reckon.
You want enough water to keep the beans covered about 1 to 2 inches, so they can swell without crowding each other.
Good bean ratios help you cook with confidence, because crowded beans break apart, while too much water can dull flavor.
Check your water ratios before you start, then top up in case the surface drops during simmering.
In the event you soak initially, use fresh water for cooking so you keep the texture cleaner and more even.
That simple habit helps you feel like you belong in the kitchen, not like you’re guessing at every step.
Use a steady pot, and trust the process.
Pressure-Cook Different Beans
Provided that you’ve already got the bean-to-water ratio sorted, pressure cooking can make the whole process feel a lot easier and faster. You can match time to the bean you’re using, so your kitchen rhythm stays calm and steady.
- Black beans: 20 to 25 minutes
- Chickpeas: 35 to 40 minutes
- Kidney beans: 25 to 30 minutes
Start with fresh water, lock the lid, and let the cooker do the heavy lifting. Then use a natural pressure release for a few minutes, or follow your cooker’s guide.
Should you want variety without a long wait, pressure cooking beats many canned alternatives and still gives you that homemade feel. You’ll save time, keep your meal plan flexible, and still serve beans that fit right in with your table and your people.
Keep Beans Tender, Not Mushy
To keep beans tender instead of mushy, you need to watch both the soak and the simmer. You’re aiming for texture control, so give beans enough water to hydrate, but don’t let them sit too long in warm liquid.
After soaking, drain them well, then start with fresh water and a gentle simmer. A hard boil can make the skins split and the centers turn soft fast. Check them often, because a few minutes matter.
Once beans feel almost done, taste one and stop cooking while they still hold shape. In case you like a firmer bite, a quick cooling shock with cool water can help pause the cooking. That little step keeps your bowl cozy, neat, and satisfying.
Solve Common Bean-Cooking Problems
In case your beans still feel firm after a long simmer, you can add more hot water and keep cooking them gently until they soften.
Should the skins start splitting, lower the heat and avoid a hard boil, since rough bubbling can tear them apart.
With a few small adjustments, you can fix both problems and still end up with beans that cook evenly and taste great.
Fixing Undercooked Beans
Undercooked beans can feel like a kitchen letdown, but they’re usually easy to fix. You can keep your meal on track with a simple texture rescue and a little starch adjustment. In the event the beans still feel firm, add fresh hot water, lower the heat, and simmer them gently until they soften. Then check them every 10 minutes so you stay in control.
- Taste a bean to begin with, not just the broth.
- Add more hot water if the pot looks dry.
- Keep the lid on so the heat stays steady.
Should the beans have split a bit, don’t panic; they’ll still taste great in soups, stews, or mashed sides. You’re not alone here. With a calm reset, your pot can still turn into something warm, hearty, and worth sharing.
Preventing Split Skins
Split skins can look alarming, but they don’t mean your beans are ruined. You’re still in good company at the pot, and a few careful moves will help.
To start, keep the heat at a gentle simmer instead of a hard boil. Next, soak beans fully so they cook more evenly and keep skin integrity. After soaking, drain them and cover with fresh water. Then stir only once or twice, because rough stirring can tear skins. Also, choose fresh beans when possible, since older ones split more easily.
Should you use a pressure cooker, lower the pressure a bit and let it release naturally. With gentle handling, you’ll get tender beans that stay whole and look inviting on the plate.
Season Beans for Better Flavor
Seasoning beans the right way can turn a plain pot into something warm, rich, and worth the wait.
- Add salt after soaking or once beans turn tender so they don’t stay tough.
- Try a herb infusion with bay, thyme, or garlic for a cozy, shared-table taste.
- Finish with citrus zest to brighten the pot and wake up the flavor.
You can also cook beans in lightly salted soak water provided you want deeper taste from the start. Whenever you use baking soda to speed things up, keep the seasoning gentle so the beans still feel balanced.
Then, during the last part of cooking, taste and adjust. A little pepper, onion, or cumin can help your pot feel familiar and welcoming, like dinner’s already made you a place at the table.
Frequently Asked Questions
Does Altitude Change Bean Soaking Time?
Yes, altitude affects bean soaking time. At higher elevations, beans absorb water and soften more slowly, so longer soaking or the use of salt or baking soda can help reduce cooking time.
Should You Discard Bean Soak Water?
Yes, you should usually discard bean soak water. Fresh water often gives beans a cleaner taste and firmer texture. If you keep the soaking liquid, the finished dish can taste muddier and less balanced.
Can Baking Soda Make Beans Cook Faster?
Yes, baking soda can make beans cook faster by changing their chemistry and softening their texture. Older beans may become tender sooner, especially if you soak them first, but use only a small amount or they can turn mushy.
When Should Salt Be Added to Beans?
Add salt once the beans are tender, so cooking stays on track and the texture stays soft. Then you can build flavor step by step and serve a dish people will actually enjoy.
Do Lentils Need the Same Quick-Soak Method?
No, lentils do not need a quick soak. They cook fast on their own, and soaking can make them turn soft or mushy. Skipping the soak helps them keep their shape and flavor.